
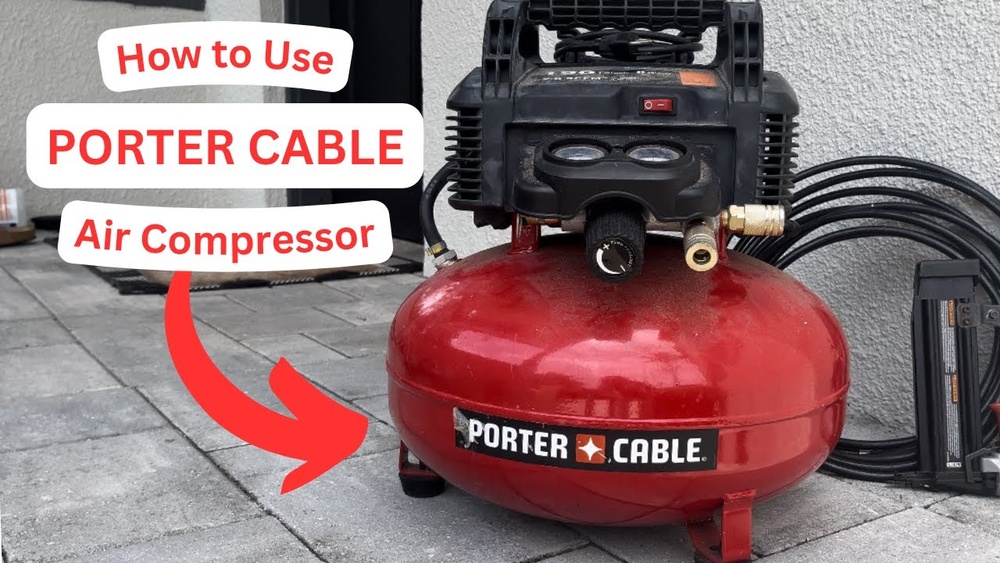
Using an air compressor can seem tricky if you’re new to power tools, but Porter Cable air compressors are designed to be user-friendly and efficient. Whether you need to inflate tires, power a nail gun, or clean machinery, understanding how to operate your air compressor safely and effectively is important. This guide will help you get started, avoid common mistakes, and get the most value from your Porter Cable air compressor. You don’t need advanced technical skills—just a bit of attention and the right steps.
Getting To Know Your Porter Cable Air Compressor
Before you use any tool, it’s important to know the parts and what they do. A typical Porter Cable air compressor comes with a motor, pressure switch, tank, regulator, gauge(s), drain valve, and air hose connection. The motor pumps air into the tank. The pressure switch controls when the motor turns on and off. The regulator lets you set how much pressure goes to your tool. Gauges show the tank and output pressure. The drain valve at the bottom removes moisture. The air hose connection is where you attach your tools.
Some Porter Cable models are pancake compressors (round, flat tanks), while others are hotdog or twin-stack types. Pancake models are popular for home use because they’re portable and stable. Always check your model’s manual for any special instructions.
Safety First: Preparing To Use Your Compressor
Before you even plug in your air compressor, take a few minutes for safety. This step is often missed by beginners, but it prevents injuries and keeps your tool working longer.
- Check for damage: Inspect the power cord, plug, tank, and hoses for any cracks or wear.
- Work in a dry area: Never use the compressor in wet locations to avoid electric shock.
- Wear safety gear: Always use safety glasses and hearing protection. Compressors are loud, and air under pressure can be dangerous.
- Read the manual: Each model may have unique features or warnings.
One non-obvious safety tip: Always face the compressor’s gauges and controls away from your body when turning it on, just in case there’s a sudden air burst.
Setting Up Your Porter Cable Air Compressor
Once you’re ready, follow these steps to set up your compressor:
- Place the compressor on a flat, solid surface. This keeps it stable and reduces vibration.
- Make sure the power switch is OFF. This prevents the compressor from starting as soon as it’s plugged in.
- Plug it into a grounded outlet. Avoid extension cords—they can cause voltage drops or overheating.
- Check the drain valve. It should be tightly closed before starting. You’ll find it at the bottom of the tank.
If your compressor has an oil window or dipstick, check the oil level. Most small Porter Cable compressors are oil-free, but it’s still a good habit to look for maintenance points.
Connecting The Air Hose And Tools
Now you can attach the air hose to the compressor. Simply push the hose’s quick-connect fitting onto the compressor’s air outlet until it clicks. To remove, pull back the collar on the fitting.
After the hose is in place, connect your air tool (such as a nailer or inflator) to the other end. Listen for a click to ensure it’s secure. Some tools need a bit of oil before use—check your tool’s instructions.
Here’s a comparison of common Porter Cable compressor models and their air delivery capabilities:
| Model | Tank Size (Gallons) | Max PSI | CFM @ 90 PSI | Best For |
|---|---|---|---|---|
| C2002 (Pancake) | 6 | 150 | 2.6 | General home use, finish nailers |
| CMB15 (Hotdog) | 1.5 | 150 | 2.0 | Inflating, brad nailers |
| PCFP12236 (Combo Kit) | 6 | 150 | 2.6 | Multiple small tools |
Non-obvious insight: Not all tools run well on smaller compressors. If your tool’s CFM (cubic feet per minute) requirement is higher than your compressor’s output, it will run out of air quickly.
Powering Up: Starting Your Compressor
Once everything is connected, you’re ready to start:
- Turn the power switch ON.
- The compressor will run until the tank fills to its maximum pressure (usually 150 PSI for most Porter Cable models).
- You’ll hear the motor stop once the tank is full. Now, you’re ready to use air tools.
Tip: Never walk away while the compressor is filling for the first time. Listen for any unusual sounds—hissing, rattling, or loud knocking means something is wrong.
Adjusting Pressure For Your Tool
Different tools need different amounts of air pressure. For example, a brad nailer may only need 70 PSI, while an impact wrench might need 90 PSI or more. Always check your tool for its recommended pressure.
To adjust:
- Locate the regulator knob (usually near the gauges).
- Turn the knob clockwise to increase output pressure, or counterclockwise to decrease it.
- Watch the output pressure gauge (not the tank pressure gauge) as you adjust.
Never set the pressure higher than your tool needs. High pressure can damage tools or cause accidents. For beginners, it’s better to start at a lower setting and increase slowly.
Here’s a simple comparison of tool pressure needs:
| Tool | Recommended PSI | CFM Range |
|---|---|---|
| Finish Nailer | 70-120 | 1.5-2.0 |
| Impact Wrench | 90-100 | 4.0-5.0 |
| Tire Inflator | 30-35 | 0.5-1.0 |
Using The Air Compressor With Tools
Once your tool is attached and the pressure is set, you can begin working. Hold your tool firmly, and always start with short bursts if you’re new to compressed air tools.
- Inflating tires: Attach the tire chuck, set pressure to 32-35 PSI for cars, and fill in short bursts. Check pressure with a tire gauge.
- Nailing: Load nails, press the nailer against the work surface, and pull the trigger.
- Cleaning: Attach a blow gun, keep the pressure below 90 PSI, and wear safety goggles.
Never point air tools at yourself or others. Compressed air can cause serious injury, even at low pressures.
A common mistake is letting the compressor run continuously. Most Porter Cable models are designed to cycle on and off. If yours runs all the time, check for leaks or a stuck pressure switch.
Managing Moisture And Drainage
Compressed air can carry moisture, which collects in the tank. Draining the tank after each use prevents rust and extends the compressor’s life.
How to drain:
- Turn off and unplug the compressor.
- Let it cool and release pressure by pulling the safety valve ring until the tank is empty.
- Open the drain valve (usually a small screw or lever at the bottom).
- Let all water out, then close the valve tightly.
Neglecting this step is a beginner’s mistake and will shorten your compressor’s life. Moisture inside the tank can also cause water to spray from your tools, which is bad for painting or cleaning.
Maintenance Tips For Long Life
Air compressors need minimal but regular care. Here are some best practices for your Porter Cable:
- Check air filter: Clean or replace every few months, especially in dusty areas.
- Inspect hoses and fittings: Look for leaks or cracks. Replace damaged parts right away.
- Test safety valve: Pull the ring occasionally to make sure it works.
- Store indoors: Cold or wet conditions can damage seals and electronics.
If your model is oil-lubricated, check the oil level monthly and top up with the recommended type.
Troubleshooting Common Problems
If your Porter Cable compressor doesn’t work as expected, here’s how to handle common issues:
- Compressor won’t start: Check for power, reset the breaker, and ensure the switch is ON.
- Compressor runs but doesn’t build pressure: Look for leaks, a loose drain valve, or a broken gasket.
- Air leaks from fittings: Tighten connections; use Teflon tape if needed.
- Moisture in output air: Drain the tank more often or add an inline air filter.
If you hear a constant hiss after the motor stops, check the safety valve. Replace it if it’s faulty.

Credit: www.youtube.com
Storage And Transportation
When not using your compressor:
- Turn off, unplug, and drain the tank.
- Coil the air hose neatly—don’t bend sharply.
- Store in a dry, dust-free area.
- Never lift the compressor by the hose or cord—use the handle.
For transport, always empty the tank and secure the compressor to avoid tipping.
Advanced Tips: Getting The Most From Your Compressor
- Use the right accessories: Add a filter or lubricator for spray painting or sensitive tools.
- Upgrade hoses: A longer or larger-diameter hose lets you reach farther but may lower pressure slightly.
- Split output: Use a Y-connector to run two tools at once, but only if your compressor is powerful enough.
A less-known trick: If your compressor seems slow to refill, check the intake filter. A clogged filter reduces airflow and performance. Clean or replace as needed.

Credit: www.northerntool.com
When To Seek Professional Service
If you notice burning smells, smoke, or repeated circuit breaker trips, stop using the compressor and get it checked by a technician. Never try to repair the motor or electrical parts yourself unless you’re qualified.
Frequently Asked Questions
How Often Should I Drain The Tank?
You should drain the tank after every use. This prevents moisture buildup and rust inside the tank, which can damage your compressor over time.
Can I Use An Extension Cord With My Porter Cable Air Compressor?
It’s not recommended. Extension cords can cause voltage drops, overheating, and even damage the motor. Always plug directly into a grounded wall outlet.
What’s The Difference Between Tank Pressure And Regulated Pressure?
Tank pressure is the total air stored in the tank. Regulated pressure is the air pressure going to your tool. Adjust the regulated pressure according to your tool’s needs.
Why Is My Compressor Running All The Time?
This usually means there’s an air leak somewhere—check the hose, connections, and drain valve. If everything looks fine, the pressure switch may be faulty.
Where Can I Find More Details On My Specific Porter Cable Model?
For more detailed specs, manuals, and support, visit the official Porter Cable Support page.
Learning how to use a Porter Cable air compressor opens up a world of possibilities for DIY projects and home maintenance. With good habits and regular care, your compressor will last for years. Take your time to understand your tools, always put safety first, and you’ll get professional results at home.

Credit: www.travers.com